 |
 |
|


|
设计名称 |
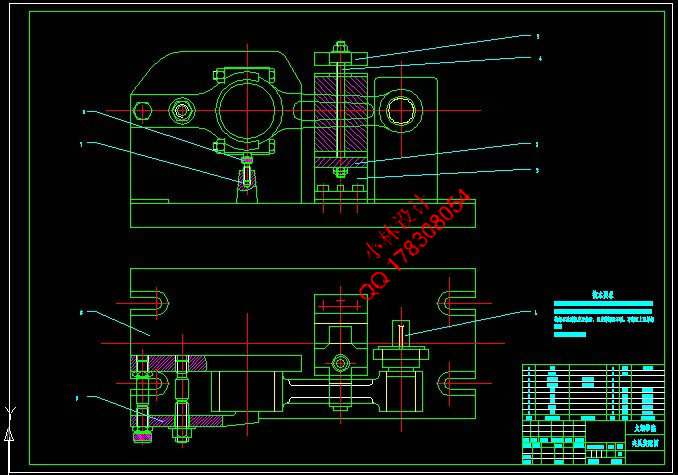
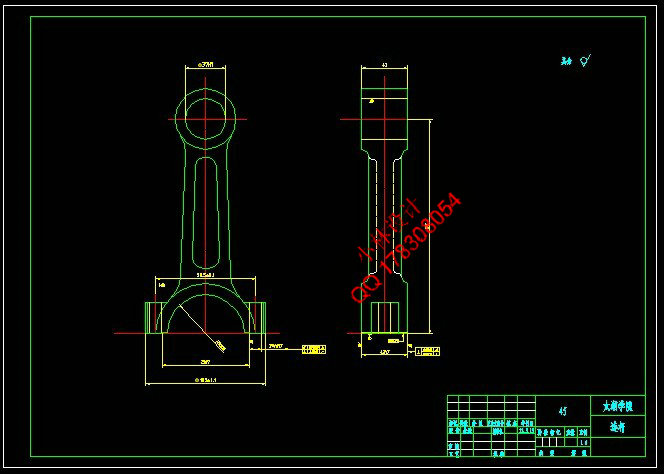
内燃机连杆加工工艺及精镗小头孔夹具设计 |
 |
|
设计编号 |
V078 | |
|
设计软件 |
AutoCAD, Word | |
|
包含内容 |
见右侧图片 | |
|
说明字数 |
18000字 | |
|
图纸数量 |
见右侧图片 | |
|
推荐指数 |
较高 | |
|
价格: |
价格优惠中 | |
|
整理日期 |
2013.9.26 | |
|
整理人 |
小林 | |
|
购买流程 |
<查看如何购买本站设计> |
|
设计简介 |
设计描述:
文档包括: CAD版本图纸,共12张
摘 要 及位置精度的要求都很高,而连杆的刚性比较差,容易产生变形,因此在安排工艺过程时需要把各主要表面的 粗精加工工序分开。逐步减少连杆加工余量、切削力及内应力的作用,以及修正加工后的变形,最后就能达到 连杆的技术要求。连杆的主要加工表面为大、小头孔和两端面,较重要的加工表面为连杆体和盖的结合面及连
杆螺栓孔定位面,次要加工表面为大头两侧面及螺栓座面等。 能否保证连杆技术要求的重要问题之一。在连杆的实际加工过程中,选用连杆的大小头端面及小头孔作为主要 定位基面,同时选用大头孔两侧面作为一般定位基准。为保证小头孔尺寸精度和形状精度,可采用自为基准的
加工原则;保证大小头孔的中心距精度要求,可采用互为基准原则加工。 关键词:连杆;变形;加工工艺;夹具设计 ABSTRACT The connecting rod is one of the main driving medium of diesel engine, this text expounds mainly the machining technology and the design of clamping device of the connecting rod. The precision of size, the precision of profile and the precision of position , of the connecting rod is demanded highly , and the rigidity of the connecting rod is not enough, easy to deform, so arranging the craft course, need to separate the each main and superficial thick finish machining process. Reduce the margin of processing, cutting force and internal stress progressively, revise
the deformation after processing, can reach the specification requirement for the part finally . both ends of the machined surface, is important for the connecting rod body and cover joint surface and the connecting rod bolt hole locating surface, secondary processing surface for bearing locking grooves, oil hole, head and body and a cover on the two sides of the bolt seat
surface.
clamping force ) under the action of easy deformation.
residual stress, and stress redistribution caused by.
big hole clamp surface fixture design, mainly divided into the following two aspects: very high technical requirements, so the appropriate selection of mechanical processing in the locating datum, can ensure the connecting rod is one of the important problems of technical requirements. The connecting rod in the practical production process, selection of connecting rod to the size of the head end and the small head hole as the main positioning datum, and choice of big hole two side as a general locating datum. In order to ensure the size precision and shape precision of the small head hole, can be used for reference from the processing principle; ensure that the size of the first hole center distance accuracy requirements, can be used for reference
each other the principle of processing. Key words: Connecting rod;Deformation;Process;Fixture design
目 录 |
|
部分图纸 截图 |
   |
|
说明: |
如需了解本设计的具体详细信息请联系本站客服,说明看哪个设计(编号)哪个详细部分,我们将远程或截图给您观看. 机械毕业设计|论文 |

| [要求PR≥2,百度收录≥1000页;联系QQ:178308054] |
Powered by 小林机械资料商城 © 2013-2020 All Rights Reserved. 客服QQ:178308054
喜欢www.xiaolinbysj.com,请告诉你QQ上的5位好友,多谢您的支持! 皖ICP备2021006205号-1
